The location of buildings on the site: bathhouse, garage, boiler room. Useful tips: how to properly arrange buildings on the site Location of the garage and house on the site
A parking space and car repairs are an important part of a summer cottage and a private house, providing the comfort of the owners, their guests and neighbors. The need for permits for a new building depends on where and on what site it is planned to place the garage.
If the construction will be carried out outside the limits of private ownership, and also in the case when it is necessary to include the construction in the capital plan, it is necessary to contact the state authorities. In all other cases, it will only be necessary to comply with a number of sanitary-technical and fire-prevention standards.

Registration of documents for construction in the state territory
As a first step, you need to apply to the local government in writing with a request to allocate a land plot.

In case of a positive outcome, a corresponding decree will be adopted and issued, with urban planning data and an attached diagram showing the boundaries of a private plot and the adjacent permitted zone. After the transfer for certification to the architectural control authorities, the paperwork can be considered complete.

The capital construction project within the land plot is undergoing the approval procedure in the same authorities. The drawing must also indicate the adjacent sheds and outbuildings, if any.


General placement rules
In addition to the basic technical building codes that ensure the strength of the building, there are a number of specific rules for garages related to communications and fire safety.

The wall of the building must be at least 1 meter away from the fence. In the case when there is another capital structure in the neighboring area near the separation fence, the distance between it and the building for cars must be at least 6 m.

This is an important safety requirement in the event of a fire, if not observed, a decision may be made to demolish or relocate the garage.

There are also restrictions on the placement of garages near the boundaries indicated in urban planning drawings with a red line. In the immediate vicinity of them, communication lines can pass, access to which must not be blocked. According to the building rules, the minimum distance from the red line is 5 m.


The garage door must not be in line with the border. A 5m buffer zone between the building and the outer perimeter is the most appropriate option. In this case, the car in front of the garage will not interfere with traffic.

Garage entrances and exits must not intersect internal and external walkways.


Attached carports adjacent to the garage, or intended for parking, if approved by the regulatory authorities, can be located near the red lines, or even cross them.

Compromise option for the location of the garage
There are times when the features of the layout do not allow placing the garage at a sufficient standard distance from the buildings erected on the neighboring site.

To avoid complaints from neighbors and ensure their safety, a number of additional measures will need to be taken:
- equip a special fire shield and purchase fire extinguishers,
- install a separate electrical line with a fuse system,
- refrain from using electric heating in the garage,
- ensure the proper quality of wiring and the presence of protective shades on lighting fixtures.

It is also necessary to conclude a written agreement with the owner of the neighboring site, in which he will give permission to violate fire safety standards. As a rule, such documentation is updated every 3 years.

Features of the layout
Garages, in addition to their main function - a covered parking lot, can combine other economic functions. They are most often used as a workshop and storage room. Therefore, when creating a project, it is important to provide free access to the structure and correctly calculate its dimensions.

The erection of a separate building, standing at a distance from fences and buildings, with a dedicated driveway and footpath is an ideal choice for ensuring comfort and safety.

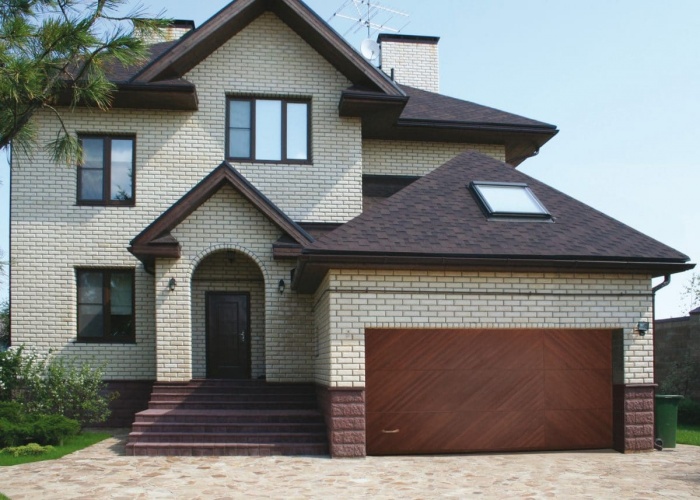
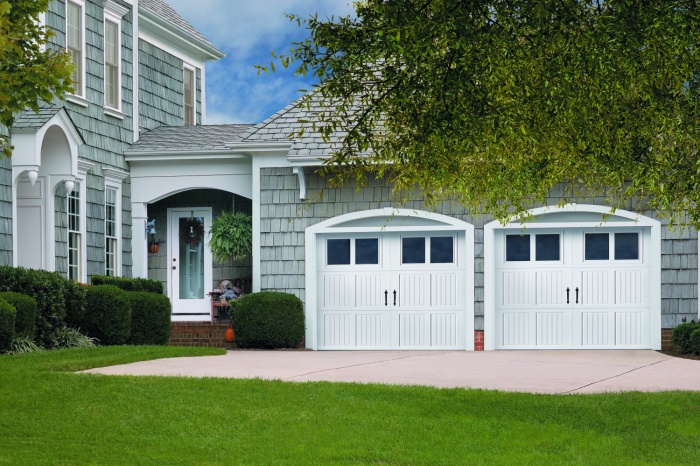
In addition, as can be judged from the photo, a detached garage on the site can become a stylish architectural structure that emphasizes the taste and well-being of the owners.

Fence garage
With a sufficiently wide front part of the fence, and there are general security guarantees (for example, a security guard in a cottage community), this is the most convenient option.

It will be easy to drive from the street, and the noise of the engine will not disturb the inhabitants of the house. In this case, you can make two entrances and exits - external and from the site, in order to provide the best access to the utility room.

Garage in the house
Equipping a garage directly in a residential building, or building an extension adjacent to a residential part, has a number of advantages and disadvantages. The proximity of the location facilitates access, especially in bad weather. In this case, it will also be easy to lay communication lines and install a general security system.


But the close proximity to the parking lot, especially in cases where maintenance and repairs are carried out in the garage, becomes not only the cause of excessive noise: the emitted motor gases are toxic and harmful to health.

When choosing this option, temporary accommodation, such as a gym or library, should be located above the garage. You will also need to take care of additional measures to protect against accidental fire.

Before building a garage with your own hands, you need to consider the features of the topography. Drainage and relief correction may be needed.

Photo of the garage on the site


Your own suburban area is a place that you can arrange to your liking. Meanwhile, it is impossible to arrange buildings on the site as you like. Their placement is regulated by SNiPs and other regulations. Where can you build a garage on the site and what are the standards for building a garage from a fence and other buildings?
Do I need a building permit
You do not need a permit to build a garage on an individual housing site. This is stated in the town planning code, which states that a permit is not required in the following cases:
- for the construction of a garage on land provided to an individual not for the purpose of conducting commercial activities or on a plot designated for gardening activities (for example, land owned by a dacha cooperative);
- construction on the site of auxiliary structures.
Another thing is that a capital garage built on a plot of individual housing construction or private household plots must be registered, since such a building is also taxed, like a house. First, they receive a certificate of ownership of the land on which the building is located, and then the garage itself is legalized. To do this, you need to collect the necessary documents and contact Rosreestr.
If you have an unregistered building on your land, you may have problems selling the land. A garage built in violation of the norms, which will be discussed below, can be recognized as an unauthorized construction, and by a court order it can be demolished.
Also, permission is not needed for the construction of any non-capital (temporary) structure, that is, a building without a foundation. Such a building does not belong to real estate, as it can be moved at any time.
How can you place a garage on the IZHS site
In practice, in many cases, building codes are turned a blind eye. However, placing a garage in violation of them can lead to dissatisfaction with neighbors and legal proceedings. If you turn out to be wrong as a result, then the building erected by your labor will have to be demolished. In order not to waste time, effort and money, before building a garage and any other structure on the IZHS site, you need to familiarize yourself with SNiPs.
What matters is how far the garage is from other objects. It also depends on what materials the buildings are made of.
All measurements are taken from the protruding basement of the building, and if not, then from the wall. If the roof protrudes more than 50 cm, then measure the distance from its projection to the ground.

The following placement rates are spelled out in SNiP 2.07.01-89. According to the IZhS standards, the garage belongs to outbuildings, therefore, the restrictions associated with them apply to it.

To play it safe, add another half meter to these distances.
If nothing has been built on the neighboring plot, you are in luck, and you can carry out construction anywhere in compliance with other norms (distance from the fence, from buildings on your site, from the red lines). Construction on the adjacent plot, if it starts later, will be carried out taking into account your buildings.
Important! It is the distance to the buildings on the neighboring site that can cause conflict and litigation. Even one corner closer than it should be matters. The rules for the location of buildings relative to each other on your site are advisory in nature.

Red lines and placement relative to them
Red lines indicate existing or planned boundaries of common areas and separate state from private territory. The red lines include the boundaries of territories on which various communications are laid (electricity, water supply, sewerage), the boundaries of areas on which roads and railways pass.
The red lines are reflected in the master plan of the settlement, the project for the development of the territory. The norms for the location of objects relative to the red lines have been established so that communications, roads and so on are always free access.
Any private building on your site should be at least 5 m from the red line. It can pass both along the border of the site, and be at some distance from it. If the distance to the red line is less than the prescribed one, the building can be demolished by a court decision. It is possible to arrange the garage differently, for example, so that it itself or the shed adjoins the fence from the side of the roadway, after coordinating this issue with the board.
Fire safety
In addition to the norms for placement in relation to other objects, it is necessary to comply with fire safety requirements. If you comply with all fire safety standards, you can reduce the distance to neighboring wooden buildings. These are the following norms.
- There should be a fire shield and a fire extinguisher near the garage.
- It has no heating.
- The wiring is done in accordance with PTEEP (Rules for the technical operation of electrical installations of consumers).
- The electrical wiring is routed in a metal sleeve.
- The electrical wiring goes through a meter installed in the house.
- The bulbs have factory shades.
- There are automatic fuses.
Thus, if your garage is heated, then it will not work to build it closer than specified in the norms. However, there are other ways to bypass SNiP without risk. To do this, you need to negotiate with your neighbors.

Is it possible to bypass SNiP
Under certain conditions, it is possible to build a garage in violation of these norms. This requires a written agreement with the neighbors, which must be notarized. Such a document is valid for three years, after this period it must be renewed. At the same time, the garage must be built in compliance with all fire safety standards mentioned above.
You can also build a garage close to a neighbor's. You can also put the garage in such a way that one of its walls replaces a part of the fence. In the latter case, a conflict with neighbors may arise if your building shades their plantings. Therefore, before starting construction in this way, it is necessary to negotiate with the neighbors and conclude a written contract.
Important! A written contract is concluded with specific people. If the neighbors sell the plot, a conflict may arise with the new owners.
In this case, the limitation period of the statement of claim is 3 years, and if no problems have arisen during this time, then the construction can be considered legal.

Basement accommodation
The garage can be built not only as a detached building or an extension to the house, but also in the basement of the house itself. According to SNiPs, the basement floor is buried into the ground by no more than half the design height of the room, and the upper part of the floor is located no more than 2 m below the ground surface.
As for the device in the basement floor of the garage, SNiPs recommend sealing its floors and walls so that exhaust gases and odors do not penetrate the living quarters. For this, various insulating compounds are used. It is also necessary to make a separate duct ventilation. In the basement floor, special attention should be paid to waterproofing. Walls and ceilings must be made of non-combustible materials.
Accommodation in a residential building
If the garage is located in the house itself on the ground floor, the rules here are the same as when installing it in the basement: duct ventilation and the installation of walls and ceilings made of fire-resistant materials. If the windows of other rooms are located above the entrance to the garage, a visor with a width of 0.6 m or more must be provided above it.
Close to home placement
If the garage is adjacent to a residential building, then the distance from the garage and from the house to the border of the plot is measured separately. At the same time, the distance from the house to the border of the plot must be at least 3 m, and from the garage - at least 1 m. Also, the garage can be attached to an outbuilding.
As for parking a car on or near the site, there are no rules for its placement. It is important that a standing car does not obstruct the road and does not block the entrances and exits of neighboring sections.
SNiP norms are in the nature of recommendations, but experts advise to adhere to them strictly. If your garage is built in violation of the standards, and the neighbors can prove that this somehow infringes on their rights, creates a threat to life and health (for example, violates fire safety standards, obstructs the passage that may be needed for a fire engine or ambulance) , then, by a court decision, the building will have to be moved to another place, and in the case of a capital structure, this is not so easy to do.
Conclusion
Thus, the place where you can build a garage on the site is quite clearly regulated by the norms. You can arrange it in violation of SNiPs, but only on condition that the neighbors will not have any complaints against you. This agreement must be recorded in writing.
When purchasing a plot for the construction of a residential building (or summer cottage), the new owner, in anticipation, begins to plan what and where to build. Unfortunately, plans are not always feasible. Many of them may not comply with the requirements and rules established by law.
When designing a house and developing a master plan, it is very important to choose the correct location of the house on the site. The norms governing these issues will help to optimally arrange not only a residential building, but also the rooms in it in accordance with the cardinal points. This will help to protect from cold winds, drafts and let in the greatest amount of sunlight into the house. This, in turn, will save heating and lighting costs for the building.
Building codes aren't the only thing to listen to. You should take into account the experience of both your own and those of your neighbors and acquaintances. Some nuances in this case can make life much easier in the future.
Where to begin
First you need to thoroughly familiarize yourself with your new site. To do this, place the pegs around its perimeter, if there is no fence already. This will help you conduct a survey of your property. Imagine exactly what you want to see. Draw up a "preliminary" master plan.
The next step is to study the regulatory documents that govern the location of the house on the site. There are sanitary, fire and urban planning standards. All of them must be taken into account.

It is necessary to take into account all buildings, neighboring buildings, even the location of trees. To do this, you need to order this area. Documents of this kind are issued by the geodetic service.
Room insolation
The location of the house on the site to the cardinal points must correspond to the standard duration of insolation. Insolation is understood as the ingress of sunlight into a room. There are clear requirements for its duration. But they only concern living rooms. Premises for other purposes (kitchens, corridors, verandas, etc.) are not counted.
Residential buildings should be located on the cardinal points in such a way that the continuous period of insolation is the following values:
- More than two and a half hours a day from the north side from 22 April to 22 August.
- More than two hours in the central zone from March 22 to September 22.
- More than 1.5 hours from the south side from 22 February to 22 October.

These values indicate the time during which the sun must enter the room. Moreover, these requirements apply to more than one room. The number of rooms depends on the size of the house:
- A one-room apartment has one living space.
- In "kopeck piece" or "treshka" - in any of the living rooms.
- In houses where the number of rooms is more than three - in two living rooms.
In some situations, the duration of insolation can be reduced by half an hour. This applies to houses located in the northern and central zones. And only in the following cases:
- The houses were built in the central or historical part of the settlement.
- If the sun penetrates more than two rooms in two-room and three-room houses.
- If insolation is provided in more than three rooms of a multi-room building.
Cardinal points when designing a house
The location of the house on the site should be planned taking into account the cardinal points. This will help meet the requirements of indoor insolation, save on heating and lighting at home.
The least amount of light falls on the walls located on the north side. Most of the light in the rooms located on the south side. With this in mind, it is recommended that the living rooms be located on the east and west sides.

Simultaneously with the finding of the sun and its penetration into the house, it is necessary to take into account the wind rose. They are taken into account for each region of the country separately. If we talk about the central part of Russia, then the less favorable sides are the northern, north-western and western. These are the cardinal directions from which the winds prevail. Such wind flows have a higher speed, lower temperature, that is, they are stronger and colder than others.
Therefore, most often the walls on the north and west sides are made with blind or with a small number of windows. On the north side, it is recommended to place utility rooms, storage rooms, and a garage. This arrangement of premises protects living rooms.
The best way to house your home
The layout of the house on the site may not be ideal. You cannot take into account all the nuances at the same time. But you can try to do it. To do this, the following points must be taken into account:
- Site plan and its relief.
- The location of the entrance to the site from the road.
- Neighboring plots and buildings on them.
- The size of the planned house and its shape.
- Personal wishes of the owners.
Correctly selected location of the house and bathhouse on the site will help you to relax better with your family. If it is necessary to bring communications to the bath, it is located closer to the house. Places of rest (for example, barbecue) are arranged away from home, in the most secluded and beautiful place, away from strangers.

The place for growing plants should be the brightest and most sheltered from the winds.
The location of the house on the site on the cardinal points must comply with the most important rule: the shadow from the house should not be constantly on the site. If this rule is ignored, neither the owners of the house, nor the plants planted around them will be able to enjoy the warmth of the sun.
Historical location of housing
Previously, when there were no regulatory documents yet, the location of the house on the site was chosen taking into account the laws of nature. In particular - the sun.
The building itself was traditionally built on the northwest side of the site, preferably on a hill.
The porch was made from the southeast side of the house. The nursery was located in the same direction. They seemed to meet the rising sun in the morning.
The kitchen windows traditionally face the courtyard. And this means - in the north or northwest direction. But the western wall was left blank.
The layout of the house on the site
Building codes are not designed for nothing. They help to plan the location of the house in such a way as to create the most optimal and comfortable living conditions.
The requirements of sanitary norms clearly define that there should be no windows in the range of 200-290 degrees north latitude. Windows are installed on the south and southeast side. This requirement applies to a one-room apartment located in an apartment building. As for a two-room apartment, the window of one of the living rooms should face these sides. In a three-room apartment, two windows should be installed in this direction, and in a five-room apartment - three.
On the north and west sides, the location of the kitchen, storerooms, and a bathroom is provided. In this direction, it is permissible to equip the front door.
All other rooms should be located on the south or east side.
Location of rooms
The location of the house on the site requires separate compromises in solving the problem. Each of the cardinal points has its own pros and cons. They must be taken into account when choosing the location of the premises.

Most of the sunlight falls on the south side of the house. Therefore, playrooms, verandas, halls, winter gardens are usually located in this direction.
Least of all the sun falls on the north side. Little light enters the room from this side. And large windows in this case are not a solution to the problem. They only make it worse. Large glazing areas will result in severe heat loss due to cold winds. On this side of the house there are kitchens, garages, utility rooms.
The east side of the house is best lit in the morning. But in winter, the sun disappears from the windows early enough. Therefore, from this side, they equip bedrooms, offices, dining rooms.
The controversial side is the western one. It is more exposed to cold winds and precipitation than others. But after lunch, the rooms in this direction are flooded with sunlight. Usually, guest rooms and bedrooms are placed on this side (for those who like to sleep longer).
Recently, it is considered fashionable to follow the requirements of feng shui. The location of the house on can also be built according to the laws of this science. But in order to do this correctly, you need to seek the help of a specialist. This is an expensive pleasure. Therefore, this is a justified step only if you plan to live according to the proposed recommendations. If there is no such desire, you can only stick to some specific points.

The location of a residential building on a plot of the correct shape should approximately coincide with its center. If the elongated section is located closer to the long side. Moreover, the building is being built not from the edge of the site, but in depth. But there should be more space behind the house than in front of it.
Common rooms are located on the west side. But it is recommended to equip the bedrooms in the direction of the sun, that is, on the southeast side. Bedrooms on the west side are not available.
Conclusion
The location of the house on the site plays an important role in creating comfortable and cozy living conditions. Traditions, recommendations and requirements of legislative bodies will help to do everything right. But all these norms can change taking into account the climatic zone of the region of residence.
Mandatory requirements for compliance with sanitary and fire safety standards when planning summer cottages are given in the article.
This article will discuss the basic principles of planning summer cottages. Some examples of planning problem areas are given.
Introduction
Having received the long-awaited land plot at your disposal, you, of course, want to quickly start implementing your grandiose plans for the development of new possessions.
But do not rush to pick up a shovel and take action.
In order to carry out practical actions competently, efficiently and at the lowest cost, it is necessary to carry out preparatory work.
What is this?
First of all, it is necessary to conduct a study and evaluate the site for a number of indicators and, using the data obtained, draw up a plan for further actions.
This work can be divided into the following stages:
Stage 1. Assessment of the land plot
The layout of a personal plot depends on many natural and planning factors.
The first step in planning a site is an objective assessment of its characteristics.
What is this?
Based on the realities of the area on which the allotment is located, it is necessary to consider and evaluate the following points that characterize the site:
- terrain relief;
- the shape and size of the site;
- general architectural and planning structure of the settlement or dacha partnership (depending on the location of the suburban area);
- soil type;
- the presence of groundwater;
- prevailing winds (wind rose);
- the location of the site relative to the cardinal points, the illumination of its zones.
As a result of this work, material will be obtained that will help clarify the possibilities of implementing your plans in accordance with the realities of the area.
What you need to pay attention to
- Terrain relief. It can be very diverse - from a flat surface to slopes of a mountain, hill or ravines. This will determine the location of a residential building and other buildings, the choice of planning style, the construction of engineering systems, etc.;
- The shapes of the plots are also very diverse. It can be a rectangular area close to a square, rectangular elongated or narrow, rounded angular, having the shape of the letter "g", triangular and other options. The principles and style of site planning will depend on the form.
- Soil types can be: clayey; light, heavy and medium loamy; sandy loam; sandy; humic. It may be necessary to bring fertile soil to the site. The acidity of the soil will determine which trees and vegetables can be planted on it;
Note: At the same time, they use detailed soil maps available in each district, collective farm or state farm.
You can determine the type of soil in the most practical way - by rolling a lump of moist soil between the fingers in the form of a flagellum. Rolling the flagellum into a ring, one observes the appearance of cracks on it. Clay soil does not crack, heavy loamy soil - slight cracking, medium loamy cracks significantly. The breaking of the ringlet is typical for light loamy soil, and the non-rolling of a wet lump into the flagellum is typical for sandy and sandy loam. Samples are taken at a depth of 10-15 cm from the soil surface in different parts of the plot.
The acidity of the soil can also be determined at home using litmus paper or a special express device. To do this, place 2 tablespoons of soil from the top layer (0-20 cm) in a glass container (jar, glass), add 100 ml of cold boiled water, shake for 5 minutes and allow to settle for 2-3 hours. Then the tip of the litmus paper is dipped into the settled solution and the changed color of the indicator is compared with the attached color scale.
- The groundwater level at the site determines the need for its drainage and removal of flood and storm water, the selection of fruit trees.
Note: Contact your local architect for information on the water table at the site. If there is no such data on the site, then you can get it yourself. In the middle of summer, if there are no sharp climatic deviations in the spring (very late spring or rainy summer), wells are drilled in several places of the site with a depth of 1.5-2 m. When water settles in them, the water level to the soil surface is determined with a measuring ruler. At a mark of less than 1 m, drainage of the site is required, at a mark of 1.5 m, it is desirable. Otherwise, with heavy rainfall, waterlogging may occur, which can cause the death of all plantings.
- The prevailing northerly and northeasterly winds in the area have a bad effect on the productivity of garden and vegetable crops, and can lead to freezing of trees. If those prevail on the site, it is necessary to take measures to protect against them. These data can be obtained from the region's meteorological service.
- The location relative to the cardinal points, the illumination of the areas of the site will allow you to correctly orient residential buildings, a garden and a vegetable garden on the terrain, and correctly select plants suitable for a given place.
Note: To find out the insolation (lighting) mode of the site, you can apply the following technique:Choose a sunny day. In the morning (8-9 o'clock) on the plan, mark the boundaries of the shadows falling from the house, fence and buildings located on the site, as well as from large trees and shrubs. Repeat this at noon (12-13 hours). Then in the evening (17-18 hours). Mark the borders of the shadows with hatching. On the paper, you will see areas of deep shadow (on which the hatching is applied three times, i.e. with each measurement). Marked with double or single shading, these are medium-shaded places (the sun comes in here only in the morning and in the afternoon). And unshaded areas (areas of full illumination). Taking into account the results obtained, you will be able to correctly orient the zones of the site and choose the plants suitable for the given place.
Stage 2. Planning styles
In suburban construction, two styles of site planning are predominantly used:
- regular (geometric);
- landscape (picturesque);
- a mixed style, including elements of regular and landscape styles, also has a right to life.
1.Regular style blends well with flat, flat terrain. It is characterized by geometric patterns of buildings, beds, paths. It is more economical when focusing on growing crops. The planting pattern for trees and shrubs can be square, rectangular, checkerboard. The composition of the tracks is straightforward.
Compositions made in this style imply the correct arrangement of elements in relation to a given or main axis, strict geometric shapes of landscape elements.
Water bodies also have a strictly symmetrical, usually rectangular shape, paths and alleys should be straight, even and clear.
Regular style
2. Landscape style differs in free placement of plants, complex micro-relief, winding lines of paths, smooth changes in forms and types of vegetation. The landscape style assumes a less utilitarian use of the territory, gives the site a picturesque and attractive look.
This style assumes a free, natural arrangement of landscape elements. Straightness, correctness of shape and symmetry are completely excluded.
An obligatory feature of the style is the uneven terrain with ravines, artificial and natural hills, irregularly shaped reservoirs.
The paths located on the site should have a winding structure, but the turns, at the same time, should not be far-fetched and sharp, The material of the paths is necessarily of natural origin or imitating it.

Landscape style
3. Mixed style... Combines elements of the previous two styles.
Depending on the location of the site, it gives a wide choice of building plans. Recently, it is the preferred style when planning summer cottages.
Each type of style is attractive in its own way for summer cottage planning and its choice depends on the taste and design of the developer.

Mixed style
Stage 3. Zoning of the site
As we already know, the territory of the site can be conditionally divided into zones:
- living sector;
- the area of personal and household services;
- rest zone;
- gardening zone.
When planning, it is necessary to think over the rational zoning of the site, determine where and how the infrastructure facilities on the site will be located. It is recommended to allocate 9-11% of the area for building, 65-77% for a garden, a garden, 14-16% for a utility yard, driveways, paths, playgrounds and decorative landscaping.

Site zoning
Each zone should have preferences in the location on the site, depending on its size, orientation to the cardinal points, and terrain.
Planning is a creative process and depends on your imagination, although it is advisable to adhere to generally accepted requirements, based on extensive experience in summer cottage construction.
You need to pay attention to the following points:
- The house is the main building object of the site. Therefore, the breakdown of the site should begin with determining the location of the house, on which the rest of the layout of the site will depend;
- As a rule, the economic zone is planned in the depth of the site. Although it can be taken out more closely, it is advisable to hide it from view with decorative plantings;
- It is advisable to locate buildings on the site so that they protect the site from the prevailing winds and do not shade it. It is best to place them on the north or northwest side. Near the border of the site, you can plant a shrub that is not afraid of the shade (raspberries, gooseberries, currants);
- The location of the recreation area on the site can be very diverse, both maximally arranged in one place, and located throughout the site. It depends on what kind of occupation and what type of rest the family members prefer (after all, any family consisting of people of different ages prefers to organize their leisure in different ways);
- The gazebo, where all family members and guests gather, should be located in a picturesque place, in a pleasant shade of trees and surrounded by flowers;
- It is advisable to take the more sunny side under the garden and vegetable garden. In this case, the shadows from the buildings will not fall on the green spaces, which means that the harvest will be larger and of better quality.
For an effective solution to the issues of site planning, it is advisable to observe a number of basic principles:
- rational placement of functional areas of infrastructure;
- minimum land allotment for the entire development complex and footpaths;
- the shortest distances to move between buildings.
Stage 4. Drawing up a plan - site diagrams
Now everything that you have in mind must be put on paper. This is best done in the form of a blueprint.
For a deeper understanding of the face of your site and saving money, you can make a plan yourself. This requires a little sketching skills, an idea of scale and some spatial imagination.
How to do it?
On a sheet of paper, draw a plan of your site. Let's say this is 9 acres - a square with sides of 30 by 30 meters.
The most convenient scale is the 1: 100 scale. That is, in the drawing, the area will decrease to 30 by 30 cm. Line the entire field with a grid with 1x1 cm squares. Each square centimeter of the circuit is in reality a square meter of land.
Now it is necessary (again on a scale) to cut out buildings, a garage, a flower garden, a pool, etc. from paper, that is, what you want to see on your site. Moving the figures along the planueti, select the place you like and functionally corresponding to its purpose on the site. In this case, it is necessary to comply with the sanitary and fire safety standards, which were mentioned in the previous article.
The principles of planning summer cottages, landscape design are a whole science. Moving the pictures of objects along the plan, you will better understand where it is comfortable to place what you want to see in your country house.
The layout of the site, the choice of the location of plant compositions and other design elements must be determined taking into account the main factors of the terrain, the geometric dimensions of the site, the growth and development of plants, the composition of the soil, the depth of groundwater, and climatic conditions.
The plan can be made voluminous by gluing large-scale models of buildings out of paper, some elements can be molded from plasticine. These decorations will help determine, for example, where most of the day the projected house will cast its shadow, where it is not desirable to set up a vegetable garden or flower beds, etc. These simple manipulations will help you get rid of bitter disappointments, alterations, replanting plants in the future and, as a result, save money.
It is imperative to indicate the location in the plan:
- houses with main and additional entrances;
- auxiliary and outbuildings (sheds, showers, baths, summer houses, garages, etc.);
- playgrounds, sports grounds, paved and paved paths;
- fencing site;
- the location of the plant composition and other design elements;
- passing over the territory of overhead transmission lines and underground communications (if any on the site). The transmission lines can be identified visually, and the placement of underground utilities can be obtained from the chief architect of the area in which your site is located. This is necessary in order not to plant tall trees with a powerful root system in these places.
For a more detailed working out of the plan-scheme, the orientation of the site to the cardinal points is determined. This will be required in order to properly plan the planting and provide optimal temperature and light conditions for the plants. At the same time, the directions of the air masses are noted to determine the well-heated and protected from the wind places.
Having received a plan-scheme, it is necessary to order a master plan of the site from an official organization with its approval in the prescribed manner in the relevant state organizations. Remember that these organizations must have legal rights to these works.
The plan-scheme will help you to confidently talk with landscapers, builders (if any), to control their actions.

Rational site plan
An example of a rational plan-scheme of a plot with an area of 9 acres (30x30 meters) 1. Arrival at the site and parking for a car. 2. Residential building 3. Hozblok. 4. Decorative reservoir. 5. Rest corner 6. Barbecue area. 7. Vegetable garden. 8. Composting container 9. Sports area.

Suburban area of rectangular shape
As already mentioned, the main factors affecting the layout of the site are: terrain, size, shape of the site and its location relative to the directions of light. Based on this, we will consider general guidelines for site planning.
1. The location of the house, buildings, trees, vegetable garden on a plot of 8 acres.
- The location of the house on a flat rectangular area. A house built close to the street allows for a more intimate courtyard and garden, protecting them from the outside world. When the house is located in the center or in the depths of the site, an atmosphere of privacy is created, protection from wind, noise and dust.
- On a narrow site, it is advisable to place the house at a shorter border or closer to the side. This layout contributes to better use of the land, the space in front of the house from the entrance side expands, the site becomes less dissected, and there are more opportunities for garden planning.
- Where to locate the house if the plot is on a slope?
- On the southern slope, it is better to build a house on a high place. On the eastern and western slopes, the house is located at the northern border of the site in a high place. In the least successful terrain, with a decrease to the north, place the house closer to the western border, in the middle of the slope, possibly on a bedding.
- The main way of arranging a slope is terracing it. Also, a steep slope can be designed as an alpine slide. A small flat space is suitable for creating a lawn, and an artificial reservoir can be equipped in the hollow. Due to such a dismemberment of the territory of the garden, individual areas look quite natural, which is very difficult to do on flat terrain.
- Size plays an important role in the layout of the site. As a rule, the side of the plot facing the street (towards the "red line") does not exceed 30 m, and the length of the plot is about 60 m. Capital buildings (houses, garages) have facades facing the street. When the house is located at a distance of 5-7m from the "red line", a plot is obtained, which is called a front garden. Flowers, shrubs or small fruit trees are planted here.
- It is recommended to place trees no closer than 5 m from the house so that they do not create a large shading area and dampness does not appear in the room. Fruit or ornamental trees and shrubs are placed both around the house and in the depths of the site. It is recommended to place large spreading trees such as an apple tree, a pear tree closer to the north of the site. If you plant a cherry, apple or ornamental barren tree on the east side of the lawn, you will have a shaded resting place in summer.
- Short bushes can be planted near the entrance to the garage.
- The southern wall of the house and garage is an ideal, sheltered from cold winds, sunny place for trellis of grapes and other thermophilic plants. The vegetable garden is usually placed in the depths of the site on an unshaded area. Outbuildings are, as a rule, also located in the depth of the site in compliance with sanitary standards for distances.
- The orientation of the site relative to the cardinal points plays an important role in the improvement of the site.
- The sunny side should be set aside for an orchard, vegetable garden, the main part of the flower garden.
- Shrubs, ornamental (non-orchard) garden, lawn, part of the flower garden, outbuildings and outbuildings, barbecue area may be located in a shaded area.
- The windows of the verandas and the summer kitchen, directed to the southeast, south and southwest, provide the maximum amount of sunlight, and to the north - maximum shading and protection from overheating. By the movement of the shadow cast by the house on the site, the location of the open terrace, recreation area, carport is determined.
2. The recreation area and green lawn should be separated from the compost heaps by a row of berry bushes.
Behind the bushes, the compost heaps will not be visible from the veranda and from the house.
Avoid planting a tall green hedge along the edge of the garden area. A sparse raspberry tree on the southern edge of the estate will not shade the garden. You can also add a wooden fence to keep your neighbors from looking at the compost pit.
3. The fence.
A live green hedge is more beautiful and practical than a fence.
It will protect the garden from the wind, limit the space of the estate, fit it into the surrounding space, and attract bird friends of the garden. It can consist of 1-3 rows of trees and shrubs, both naturally growing and carefully trimmed. You can plant one hedge for two with a neighbor.
As an alternative to unaesthetic picket fences, you can also recommend a hedge made of "trimmed" shrubs, compositions of stones and flowers, thick logs, a natural-looking fence made of poles, a stone fence.
4. Lawn and playground.
The lawn usually opens onto a veranda or terrace. The playground is often located under the windows of the room where adults spend most of the day, so that the children are always in sight. Leave room for a barbecue grill at the edge of your lawn.
5. With a plot size of 12 or more acres, you can maximize the recreation area, plant a larger garden or cultivate a larger vegetable garden.
It is tempting to find a place for a small reservoir next to the lawn in the center of such a site. It is good if it is visible from the veranda, terrace. The soil taken out when digging a reservoir can be used to build a small picturesque rampart on one of the boundaries of the site, an alpine slide, or a slight slope on the south side of the house, on which roses will grow well. The entire space near the house can be occupied with grass, flowers, ornamental plants. The rest of the recommendations are the same as for smaller areas.
6. When planning, it is imperative to take into account the sanitary and fire safety standards for the distances between buildings , which are outlined in the article.
Examples of planning "problem" areas
1. Elongated (narrow) area.
It is often difficult to plan an elongated section. But, using some techniques, you can visually expand the site and make it more comfortable.
First, consider what is undesirable to do.
The regular style is not very suitable for a narrow area. One of the main mistakes is a straight path that runs through the entire plot, from which the garden becomes visually even narrower and longer.
It is advisable to divide such a site into zones so that it would not be possible to cover the entire site at once with a glance. For this, you can use the so-called "space dividers". It could be just a group of shrubs obscuring the view, a hedge, a beautiful pergola, climbing arches across the site (Example 1).

Example 1

Example 2

Example 3
For sight, you can create optical obstacles that attract the eye in the center of the site in the form of a bright color composition - flower beds (Example 2).
If along the long side you place free-form flower beds with colors in light or cold colors, and along the far short part of the site, brightly attracting flower beds with large plants will visually expand the boundaries of the site (Example 3).
By planting a large tree at the far border of the site, and at the near one - a low one, you will visually shorten the distance. You can simply plant large trees and shrubs in the far corner of the garden, and place all the rest towards the house as growth decreases.
The change in perspective is clearly shown in examples 4 and 5.

Example 4. Moving away

Example 5. Approaching
Placement on a plot of buildings, sites, garden plantings, a vegetable garden is similar to a rectangular plot, but more limited in its capabilities. It is advisable to place the house at the short front border of the plot and closer to the side, and outbuildings at the end of the plot. The middle part remains for the orchard. Recreation area, children's area are very limited.
2. Triangular section.
If the site is triangular. What to do in this case?
There is no definite answer here, it all depends on your imagination and desire. There is only one piece of advice for the developer - a plot layout plan is required. By arranging the infrastructure elements on the diagram, you will definitely find the best option for planning the site.
Below are two examples of optimal layouts for triangular parcels.

Example 1. Triangular section
Example 1: Plan of a plot of 500 m2 of triangular shape without outbuildings: 1 - house; 2 - track; 3 - lawns; 4 - rest corner; 5 - flower beds; 6 - rose garden; 7 - ornamental shrub (lilac); 8 - yard fireplace (hearth); 9 - hedge; 10 - a small sports ground (with a hedge separating it from the rose garden); 11 - reservoir (pool).

Example 2. Triangular section
Example 2: 1. House (6 x 7). 2. Hozblok (2 x 4). 3. Toilet. 4. Shower. 5. Greenhouse. 6. Compost heap. 7. Apple tree. 8. Pear. 9. Plum. 10. Cherries. 11. Chokeberry. 12. Raspberries. 13. Currants. 14. Gooseberry. 15. Strawberries. 16. Flower garden. 17. Cabbage. 18. Potatoes. 19. Carrots, beets, herbs.
3. Plot on a slope.

Slope house
A site on the side of a mountain, hill, or fold of terrain is not such a rare occurrence. How to properly plan the site in this case?
Experts distinguish summer cottages with an inclination of 15 degrees or more. The technology of building a summer house and the features of the construction process depend on the magnitude of the slope. If the slope is small, it does not affect the layout of the house, but it is still recommended to build it at the highest point of the site.
This will avoid flooding and will also provide better visibility to the entire surrounding area. If the slope exceeds 15 degrees, when choosing a project, you should stop at the one that is intended for areas with a significant slope.
To reduce the steepness of the slope, several methods can be considered:
- splitting the slope into several horizontal levels-terraces (for the terracing scheme, see below), with the organization between the edges of the terraces, retaining walls, limiting slopes. In this case, both the terraces and the slopes between them can be used for planting plants and building the necessary buildings. Each level of the terrace should be equipped with a drainage system for the removal of storm water. If there is a threat of a large amount of water coming off the slope, a concrete bump should be arranged with water drainage along the concrete channel down to the relief;
- pruning or filling the slope at the locations of buildings, plantings. In this case, it is necessary to provide for the support of the remaining or poured part on the retaining wall. With this method, the useful area of the site will increase. A drainage system is also needed here.
Tracks are made to move around the site. They can be in the form of steps and ramps. For steep climbs, a combination of ramps and steps is desirable.
There are several techniques for locating a house on the slopes:
- the natural slope is preserved, and the horizontal arrangement of the building is obtained due to the construction of a basement, sometimes of large dimensions. It can accommodate a garage, barn, kitchen. Thus, a dacha is obtained, consisting of two levels.
- on leveled terrain (see above - pruning or filling).
The preferred locations of the house, depending on the direction of the slope to the cardinal points, are set out in the section of this article - "Planning recommendations".
With a slight slope, the garden will hardly differ from a flat one, with an average one will already have to build retaining walls and terraces, and decorating a plot on a steep slope will require serious construction work. The style of the garden on the slope gravitates towards landscape solutions. But it is possible to create a regular garden as well. For example, Italian Renaissance gardens were often built on slopes and consisted of a cascade of platforms and staircases. Even a very steep slope can be arranged this way.
The topic of building on a slope is well covered in the article. .
An important point in the arrangement of the site is the strengthening of the slopes and slopes.
For this, a set of protective measures is applied, including:
- sowing various types of grasses with a developed root system, to create sod;
- mechanical fastening of slopes using biomats, gabions, cellular geo-shots, geotextiles, and other materials;
- planting tree and shrub species (mainly willow species).
4. Plot L-shaped.
A small area has a non-standard L-shape. Oddly enough, a patch of this shape is not as bad as it seems. Unusual shape can be beaten. One of the main advantages is that a site of this shape cannot be immediately grasped with a glance. Here is a concrete example of planning such a site. One of the planning tasks is to make the site look larger than it actually is, while being open enough.
Considering the small size of the site, it is advisable to place on it: a house with a terrace; parking for cars; bath; small barn; recreation area; playground; small vegetable garden; several fruit trees; lawn; flower beds.

L-shaped plot
The protruding part of the site seems to be hiding from view and should be used as a recreation area. The seemingly open area gives a surprise in the form of a secluded recreation area. It turns out like a garden in a garden. Going around the house, you suddenly have a view of the area with a barbecue. The effect of surprise is also created by the fact that the boundaries of the site are hidden by thickets of bushes, trees and flowers, and the passage to this zone is narrowed even more.
The playground, closed on all sides, is conducive to a cozy rest. If desired, it can be covered with a canopy.
With all the variety of options for planning summer cottages, there are general principles for approaching this process. The specific planning option depends both on objective circumstances - geodetic, geological, climatic indications on the ground, and on subjective - the developer's capabilities, his imagination and desires. The planning process is creative and everything is in your hands.
With the growing demand for land plots, the financial side of the issue is also growing, so the majority of those who wish rarely have the opportunity to choose what they like. We have to take those areas that the wallet allows. But you should not get upset if you wish, over time, any site can be turned into a blooming and fruitful corner of nature. The material of the summer cottage, the layout of the site will help you with this ...
Site planning. Choice of design
Important: The main thing is to immediately determine where and what will be located.
It is difficult for each owner, and it is not necessary to give ready-made recipes for the layout of the site, especially for its decorative design. Here everyone is free to do to his own taste. Indeed, even by the arrangement of the paths - not straight, but diagonally or even, if conditions permit, with several roundings - you can create coziness.
A fairly common mistake for beginners is to combine trees, berry gardens, a flower garden and even garden beds on the same site. Within a few years it will become clear that they have begun to interfere and harm each other.
There are many options for rational planning, and it is hardly worth giving preference to any individual of them. It is only important to be guided by the following requirements imposed by common sense, plant biology, sanitary standards and the rules of good human relations.

Site planning. Where to place the vegetable garden?
On a note: In such a change of vegetable crops, also include garden strawberries, which will give more opportunities to maneuver the land areas of the garden.
The "geography" of the location of the garden should also take into account other factors: good protection from the northern and prevailing winds for the area, higher relief is desirable, although lowered plots of land can also be given to cabbage and root crops.